What Searing Really Does
Let’s get one thing straight: searing meat does not ‘seal in juices.’ That’s a kitchen myth that refuses to die. Meat is not a mason jar you can’t lock in moisture by hitting it with high heat. In fact, some moisture is going to escape during cooking no matter what you do. But that doesn’t mean searing’s pointless. Far from it.
What searing actually does is kick off the Maillard reaction a chemical tango between amino acids and sugars that turns meat brown and builds layers of flavor. It doesn’t just make steak look pretty. It makes it taste better. That crackly, golden crust? That’s where the flavor lives.
Searing is really about texture and complexity. You’re creating contrast: a crisp, caramelized outside and a tender, juicy interior. You want that heat high enough to cause browning but not so hot you char the outside before the inside has a chance to come up to temp. Moisture on the surface interferes with browning. That’s why you always pat the meat dry first.
So no, searing won’t trap in the juices but it will build taste, texture, and that crave worthy crust. And that’s more than enough reason to get the pan sizzling.
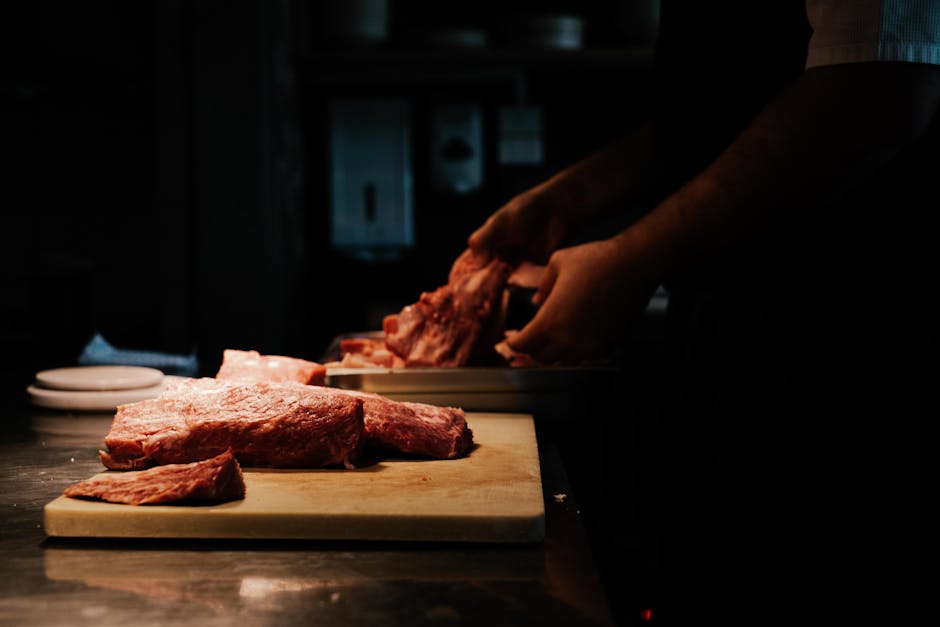
Choosing the Right Cut and Prep
If you’re looking to master the sear, start with choosing the right cut. High heat searing works best with meats that have good marbling and a decent thickness. Ribeye, sirloin, and pork chops are solid go tos they’ve got fat where it counts and fibers that can handle the heat without drying out too fast. Lean cuts like tenderloin or chicken breast can sear, but they demand a tighter technique and more attention.
Next, thickness matters. Thick cuts (1″ to 1.5″) give you room to play developing a rich crust without blowing past medium rare inside. With these, sear hard, then finish in the oven or let residual heat carry the rest. Thin cuts? You get one chance. Get your pan ripping hot and go fast. No flips for show, just one per side. You’re chasing golden brown, not gray.
Lastly, moisture is the enemy. Sear + water = steam, and steam doesn’t build crust. Pat the meat dry with paper towels right before it hits the pan. Forget the myth that searing locks in juice; it doesn’t. Dry meat gives you the sizzle you want and a crust worth bragging about. Start dry, stay hot, and don’t second guess your preheat.
Prepping for Ultimate Flavor
Before your pan hits blazing temps, your meat needs a moment. Resting it at room temperature just 20 to 30 minutes helps it cook more evenly. Cold meat hitting hot surfaces can seize up, cooking unevenly and drying out on the outside before the inside even gets warm. You’re not looking to warm it through, just take the chill off.
Then there’s surface seasoning. This isn’t just about sprinkling salt. It’s about timing and tact. Salt draws out moisture, which is bad news for searing if you do it too late. But if you season early say, 30 minutes before cooking it gives time for moisture to rise and reabsorb. You get better flavor and a dry surface ready to brown beautifully. Pat down with a paper towel before searing if necessary.
Want to dig deeper into elevating seasoning game? Check out this flavor forward guide: How to Properly Season Food for Maximum Flavor.
Pan Power: What Equipment Works Best

When it comes to searing meat, your pan choice isn’t just important it’s non negotiable. Cast iron, stainless steel, and carbon steel are the top contenders. Each has its strengths, but they all do one critical thing right: hold heat.
Cast iron is the heavyweight champ. It takes time to heat up, but once hot, it stays there even through that cold steak slap. That stability gives you a reliable, even sear and wicked crust. Carbon steel acts like cast iron’s younger cousin it heats up a bit faster, weighs less, and still retains solid heat. Stainless steel sits in third not quite as grippy on heat as cast iron or carbon steel, but it’s tough, smooth, and handles high temps well if preheated properly.
Non stick? Hard pass. The coatings can’t take the high heat required for proper browning, and they tend to shun the fond the crunchy browned bits that stick and bring flavor. Plus, most non stick pans aren’t built to take the punishment of hot searing.
End of the day, it’s about heat retention. That’s the secret to crust. If your pan cools too fast when meat hits it, you’re steaming instead of searing. Choose gear that holds the line. Hot and steady wins.
Temperature & Timing Tactics
Let’s get one thing straight: lukewarm pans cook sad meat. If you’re not preheating properly, you’re not searing you’re just steaming in denial. “Hot enough” means the pan is screaming. Think cast iron that’s been on medium high heat for at least 5 minutes. A drop of water should skitter and vanish on contact. If it just sits there, mocking you, it’s not hot enough.
Sear time depends on the protein. Here’s the no frills rulebook:
Beef (steaks, chops): 1.5 to 3 minutes per side, depending on thickness. A solid crust should form before any flipping happens.
Poultry (skin on breasts or thighs): 4 to 5 minutes skin side down. Flip only once. Skin gets one shot at crispy.
Pork (chops, tenderloin medallions): 2 to 3 minutes per side. Don’t overdo it, pork dries out fast if you’re not watching.
Fish (firm cuts like salmon): 2 to 3 minutes, skin side first. It’s delicate handle with respect.
And the golden rule for flipping: once. Maybe twice if you’re troubleshooting a hot spot. Flipping back and forth doesn’t build crust it just releases juices and murders texture. Let the protein tell you when it’s ready it’ll release easily when seared right. If it’s stuck, you’re probably rushing it.
Master these basics and you’re already better than half the internet. The rest is just practice.
Oils, Fats, and Flavor Finishers
When it comes to high heat searing, oil selection isn’t just about flavor it’s about smoke point. You want something that won’t burn when your pan is blistering hot. Stick with oils that hold up under pressure: avocado, grapeseed, canola, sunflower. These handle the heat without turning bitter or setting off your smoke alarm.
Skip extra virgin olive oil or butter for the initial sear. They burn fast and leave unwanted flavors. Save those for the later stages.
Once you’ve got your crust, that’s when the butter steps in. Toss in a knob, let it melt, and start basting. That golden foam brings color, richness, and a natural glaze that screams flavor. Don’t rush it tilt the pan, spoon it over, let it soak in.
Last move: aromatics. Garlic, rosemary, thyme they don’t need much time. Drop them in with the butter, not before. That quick heat bloom extracts deep flavor without burning the herbs or scorching the garlic. Get in, sear hard, finish smart.
After the Sear: Carryover Cooking & Resting
Searing is only the first half of the story. What you do after pulling meat from the pan can make or break the result. Resting matters big. When you let meat rest, you’re giving the internal juices time to redistribute. Cut into it too soon, and all that moisture dumps onto your plate instead of staying where it belongs. As a rule of thumb: rest steaks for at least 5 minutes, thicker roasts for 10 to 15. Tent it loosely with foil to retain heat without trapping steam and softening that prized crust.
Next, know your finish line. Internal temperature is your compass. Use a meat thermometer and pull proteins just before they hit their target temp carryover cooking will handle the final few degrees. For beef, medium rare is around 130 135°F, but that means pulling from the pan at 125 128°F. Chicken breast? Off the heat at 160°F to rest up to food safe 165°F.
Some cuts especially thick steaks or bone in roasts benefit from a two stage approach. Sear hard, then finish in the oven. Why? It gives you a deeply browned crust without burning the outside while ensuring even heat all the way through. Oven finishing also works if the sear gives you color but not the doneness you need. Go low and slow around 300°F to avoid drying it out.
Resting, reading temps, and knowing when to shift from stovetop to oven aren’t extras they’re tactical moves. Master them, and your meat won’t just look good it’ll eat better too.
Pro Tips for 2026 and Beyond
There’s no excuse for guesswork anymore. Infrared thermometers give you a read on pan temps in seconds no more waving your hand over a skillet trying to feel the heat. Smart meat probes track internal temps in real time, sending alerts to your phone so you hit that perfect medium rare without hovering. It’s precision without the stress.
And if you want that steak to be edge to edge pink with a crust that crackles, sous vide is your best friend. Sear it fast after the water bath no overcooking, just a clean bark on a tender build. You control everything: timing, texture, temp.
Don’t ignore sustainability either. Grass fed beef and responsibly sourced pork don’t just carry ethical points they sear better when handled right. These cuts often have richer flavors and tighter textures, which respond beautifully to high heat. Choose wisely, sear boldly.
Stay sharp, stay hot, and let the crust do the talking.
 Ask Cynthia Kingerstin how they got into delicious recipes and cooking tips and you'll probably get a longer answer than you expected. The short version: Cynthia started doing it, got genuinely hooked, and at some point realized they had accumulated enough hard-won knowledge that it would be a waste not to share it. So they started writing.
What makes Cynthia worth reading is that they skips the obvious stuff. Nobody needs another surface-level take on Delicious Recipes and Cooking Tips, Meal Planning and Preparation, Food Trends and Insights. What readers actually want is the nuance — the part that only becomes clear after you've made a few mistakes and figured out why. That's the territory Cynthia operates in. The writing is direct, occasionally blunt, and always built around what's actually true rather than what sounds good in an article. They has little patience for filler, which means they's pieces tend to be denser with real information than the average post on the same subject.
Cynthia doesn't write to impress anyone. They writes because they has things to say that they genuinely thinks people should hear. That motivation — basic as it sounds — produces something noticeably different from content written for clicks or word count. Readers pick up on it. The comments on Cynthia's work tend to reflect that.
Ask Cynthia Kingerstin how they got into delicious recipes and cooking tips and you'll probably get a longer answer than you expected. The short version: Cynthia started doing it, got genuinely hooked, and at some point realized they had accumulated enough hard-won knowledge that it would be a waste not to share it. So they started writing.
What makes Cynthia worth reading is that they skips the obvious stuff. Nobody needs another surface-level take on Delicious Recipes and Cooking Tips, Meal Planning and Preparation, Food Trends and Insights. What readers actually want is the nuance — the part that only becomes clear after you've made a few mistakes and figured out why. That's the territory Cynthia operates in. The writing is direct, occasionally blunt, and always built around what's actually true rather than what sounds good in an article. They has little patience for filler, which means they's pieces tend to be denser with real information than the average post on the same subject.
Cynthia doesn't write to impress anyone. They writes because they has things to say that they genuinely thinks people should hear. That motivation — basic as it sounds — produces something noticeably different from content written for clicks or word count. Readers pick up on it. The comments on Cynthia's work tend to reflect that.